
In this tutorial, I’ll be showing you how to add Contentgenie to your Facebook group.
To get started, head on to your Facebook account.
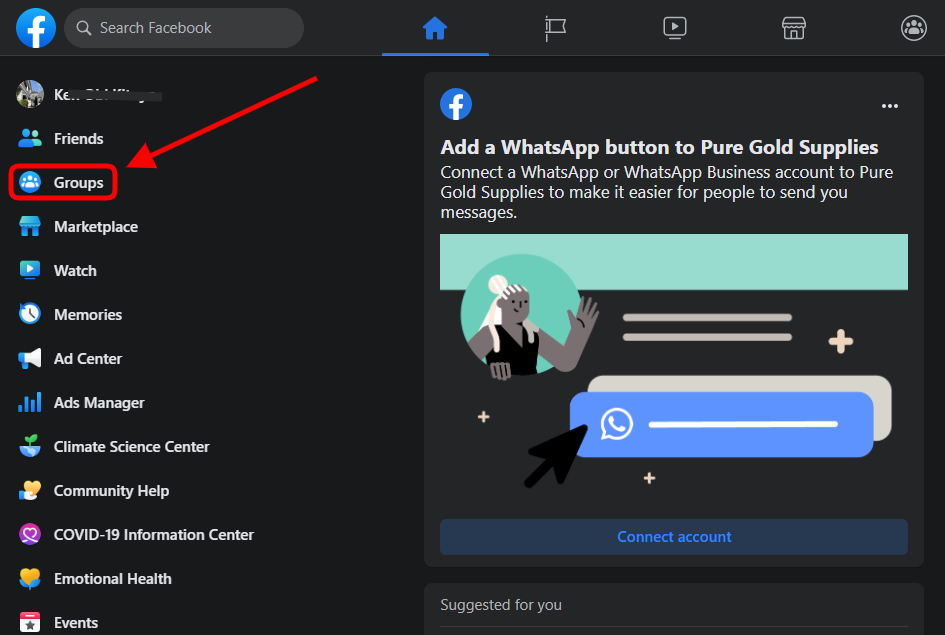
Step 1: When logged into your Facebook account, Click on “Groups”
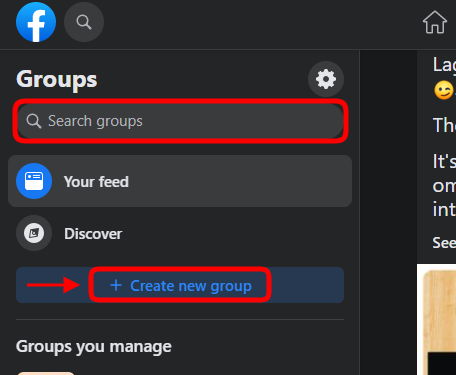
Step 2: Scroll down to select or Search for the group you want to add Contentgenie to. If you don’t have any group, click on the Create new group button to create one.
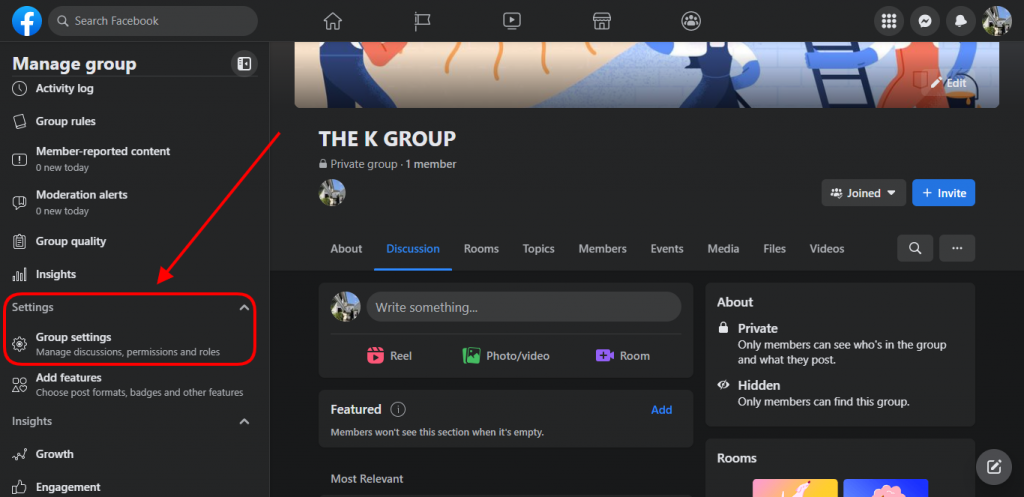
Step 3: After you’ve created or selected your preferred group, scroll down the left side of the Group and click on Group Settings
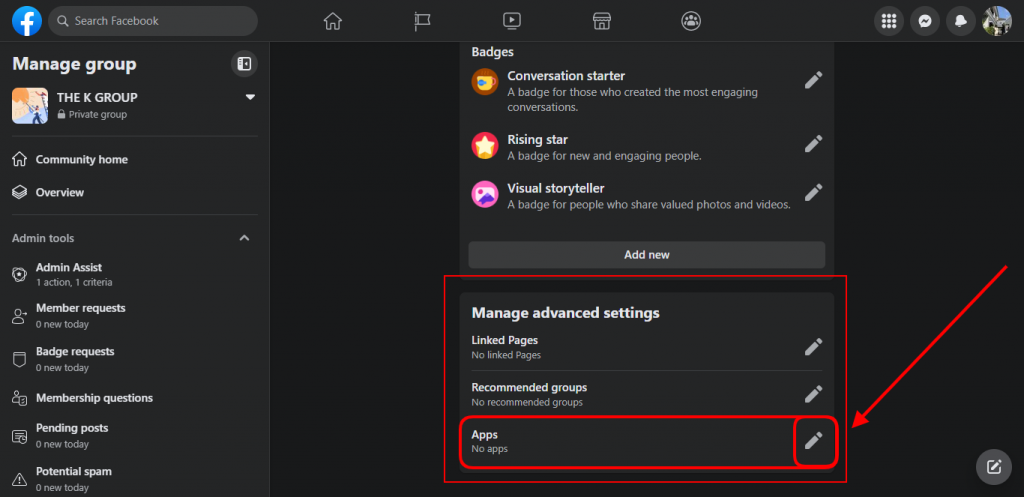
Step 4: After you’ve clicked on Group Settings you’ll see different setting options, scroll down to the bottom of the page where you have “Manage Advanced Settings” and click on ”Apps”
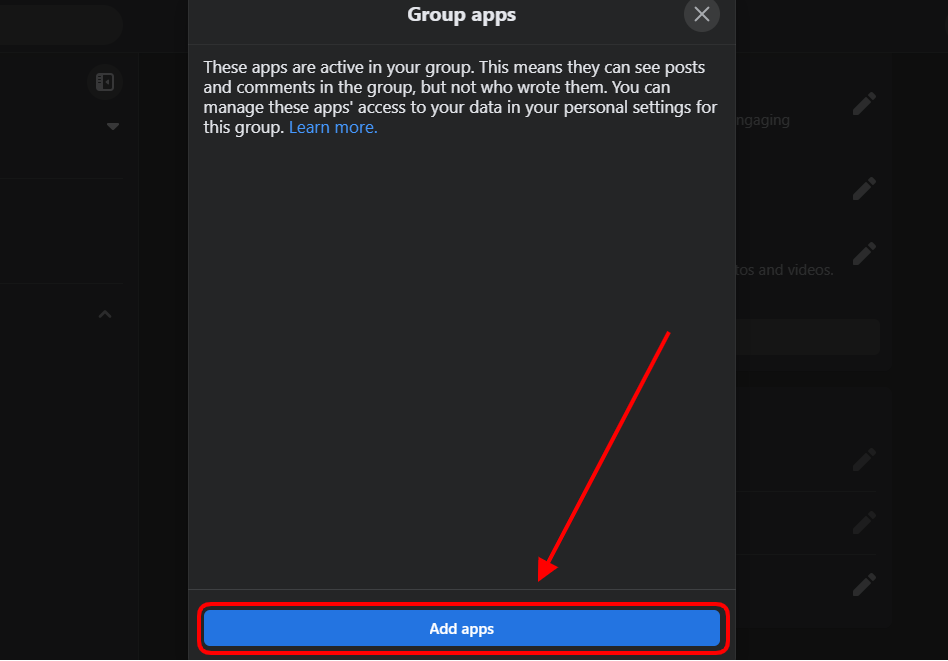
Step 5: A pop-up will appear, click on Add apps
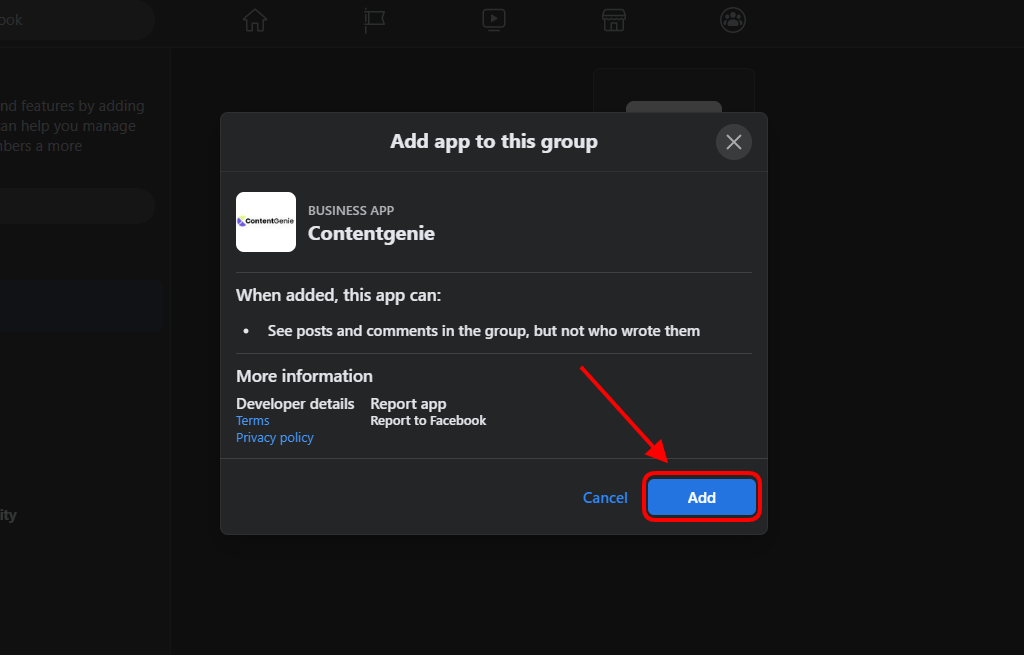
Step 6: Head on to the search bar search for Contentgenie and click on it when it appears.


Step 7: After that, a pop-up will appear. Read the information and proceed by clicking on the Add button
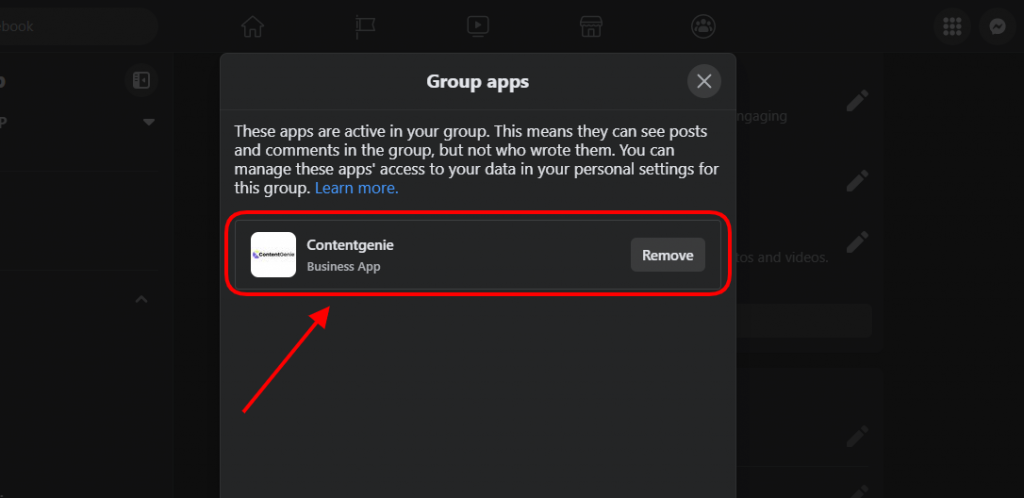
And here you have it, you’ll get a success message informing you that Contentgenie has been successfully added to your Facebook group.
And that’s it for this tutorial. Follow the link below on how to connect your Facebook Group to ContentGenie.